The Soil Warrior’s Guide to Spring Tillage Success

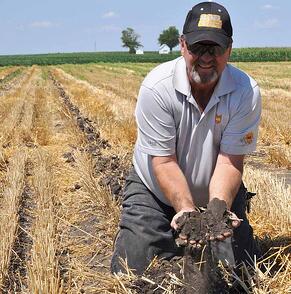
If you are an ETS customer or have spent some time at a conservation tillage conference, chances are you’ve met Kevin Kuehn. Officially, he’s the product support manager for ETS who has been with the company since its inception. Unofficially, he’s a walking strip-till encyclopedia.
Over the years he has gotten hundreds of SoilWarrior machines field-ready and trained operators to feel comfortable using the system. He’s pretty much seen and done it all. Today he is sharing his tips for preparing equipment for spring tillage.
While this checklist includes some items that are specific to the SoilWarrior system, Kuehn says it’s a comprehensive list that he hopes many farmers will find helpful.
1. Review your soil and yield goals. Consult your agronomist regarding adjustments to your application amounts and placement.
- Make sure your soil type and yield goals match up. Your agronomist can help you develop a plan if you don’t have one.
- You should also talk with your agronomist now to determine any changes to your fertilizer program or cropping rotations.
- Once you have a plan, load your products and prescriptions in your monitor.
2. Inspect your equipment.
- Start now. Don’t wait until the weather is perfect and you’re ready to head out to the field. Kuehn has answered many emergency calls on Sundays when clients are ready to go by their machines aren’t. It’s best to tackle any issues now before you want to hit the perfect planting window.
- Begin with your tractor and monitors. Order your tractor inspection. Make sure your monitors and rate controllers are loaded with the most current version of software and maps. Update your RTK or CORES subscription.
- Examine your fertilizer system. If you have a liquid system, run water through your hoses to make sure there are no leaks. Flush out antifreeze if the weather allows or reload with anti-freeze. A 12 row system takes about 12 gallons of RV anti-freeze. Put on the correct nozzles. Check your spray pattern and flow rates. Use running water to make sure there is nothing blocking your flow valves.Why is it important? Kuehn says customers have called him with tanks full of fertilizer and no way to get it out because there is a blockage in the system. On the other end, customers with liquid systems have had full tanks and product spraying out holes in hoses.
- Inspect your cart frame and tires. Check the pressure of your tires and make sure they’re inflated properly. Look at the overall condition of the tire as well was the wheel bearings. Review the systems frame and toolbar for any possible issues.
- Look at your row units. Examine coulter quality and condition. Lube hubs and parallel links. Test your compressor, regulators, and airbag pressure before you get in the field to ensure there are no leaks and functioning correctly. Check your depth control setting to make sure it’s set for the desired tillage depth; deep in the fall and shallow in the spring.
- Note: Fertilizer tubes are set correctly when they are two finger widths behind the coulter or shank. Replace any worn parts. Contact our Service Department if you need consumable parts.
3. Train your operator and yourself.
- Every SoilWarrior comes with on-site training and an operator’s manual. The manual is located in the black toolbox attached to your SoilWarrior. Take some time to re-familiarize yourself and your operators with the machine prior to heading to the field. If you have questions, just give us a call and we’ll get you an answer.
There are so many elements that can limit your planting window, which are out of your control. With a little prep work, your tillage system shouldn’t be one of them.
Comment